Every once in a while I stumble upon a situation that requires a special tool - be it hardware or software. A friend of mine had a 2.5“ HD that unexpectedly died during regular usage in a laptop. As a specialist cited over 1,000 € to recover the data, it was "written off" as the content was not deemed that important since chunks of it were available on other media. Having done some recovery on partially non-responsive drives in the past, I asked him to mail me the drive to "play around“ with and see what's possible without special recovery tools, physical repairs and etc. Here is a wikipedia article on data recovery.
— DISCLAIMER —
Under no circumstances do I recommend to try and cheapen out on data recovery if you really need that data. There are great data-recovery companies that will restore most of your data on a failed drive. Most DIY attempts often result in a lowered rate of recovery or higher cost, because more gets damaged. Be prepared to lose all your date if you follow these instructions. If you value your data, you should look at professional services.
— DISCLAIMER —
In the past, I successfully used a very nice (not free but affordable) tool called R-Studio to recover some photo albums on a colleague's external drive. It was partially unresponsive because some sectors got damaged (probably by a headcrash). I can recommend this tool for the final extraction of data from an image of a physical drive or from a drive with a logical issue like a damaged partition table. The recommendation on data recovery is to read from a physical drive only once. Every attempt at reading a broken drive increases the risk of areas getting damaged.
In the case of my friend's 2.5“ HD I had no success with R-Studio, because the drive would lock up on any attempt to read anything. Kind of frustrated, I put the drive away for a few weeks, thinking of other ways to access it. I read about stuck drive heads on certain models, which you could unstick in a "hazardous DIY style“ - without a clean enviroment (see my disclaimer above). Confirming again that the HD was definitely written off, I opened the HD only to find that the heads were in park position, nothing obviously broken (at this point I probably introduced a good amount of dust/particles into the clean HD enclosure).
I continued to research in some forums to see if I could make an attempt at maybe switching heads with a cheap donor drive from ebay, but realized pretty fast that this is a job only for professionals with the right skills and equipment (and clean environment). I also learned about hardware interfaces like deepspar disk imager and similiar tools that will circumvent certain HDD software/read issues to get a partial image from a damaged drive. As those interfaces start in the 2,000 - 3,000 € range, I also dismissed this option. My conclusion that one of the four heads is damaged gives me reason to believe that such a solution would not have helped in terms of percentage recovered.
Back to software!
I remembered that an IT colleague once mentioned a free linux tool called "ddrescue“, which allegedly had some success recovering data from a damaged drive. I put the HD in a spare computer and played around with "ddrescue" with moderate success. I then stumbled upon the reverse option, which only attempts to read a drive starting from the end of it. Success! Data started to flow to an image on a functional drive, albeit slowly - with around 400kb/sec and a few weeks time remaining to finish. At this point, I was tempted to just let it run for that amount of time until the drive was fully read. After maybe a day or two, I noticed that reading data had stopped and the damaged drive was not recognized anymore. Attempting to read dead sectors seemed to result in a hangup. With only a few GB rescued, I went back to research for a better tool.
HDDSuperClone
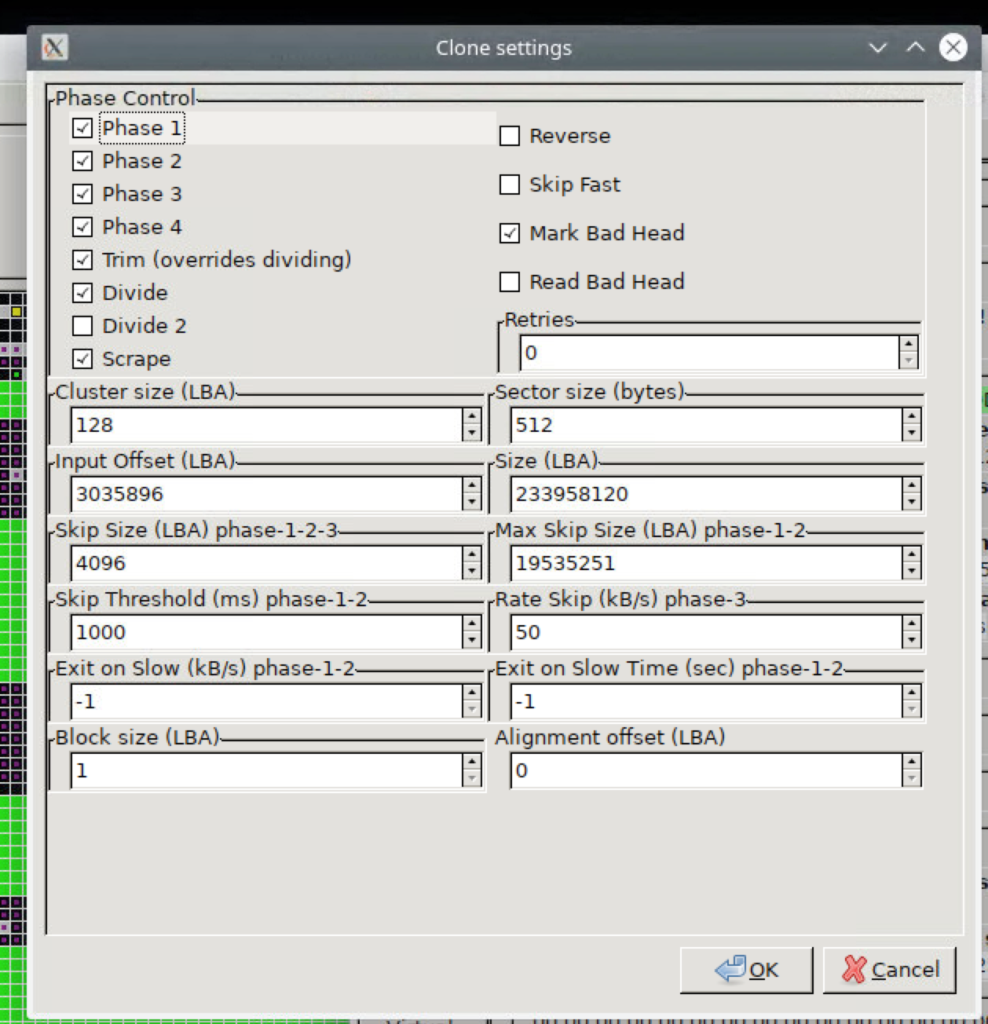
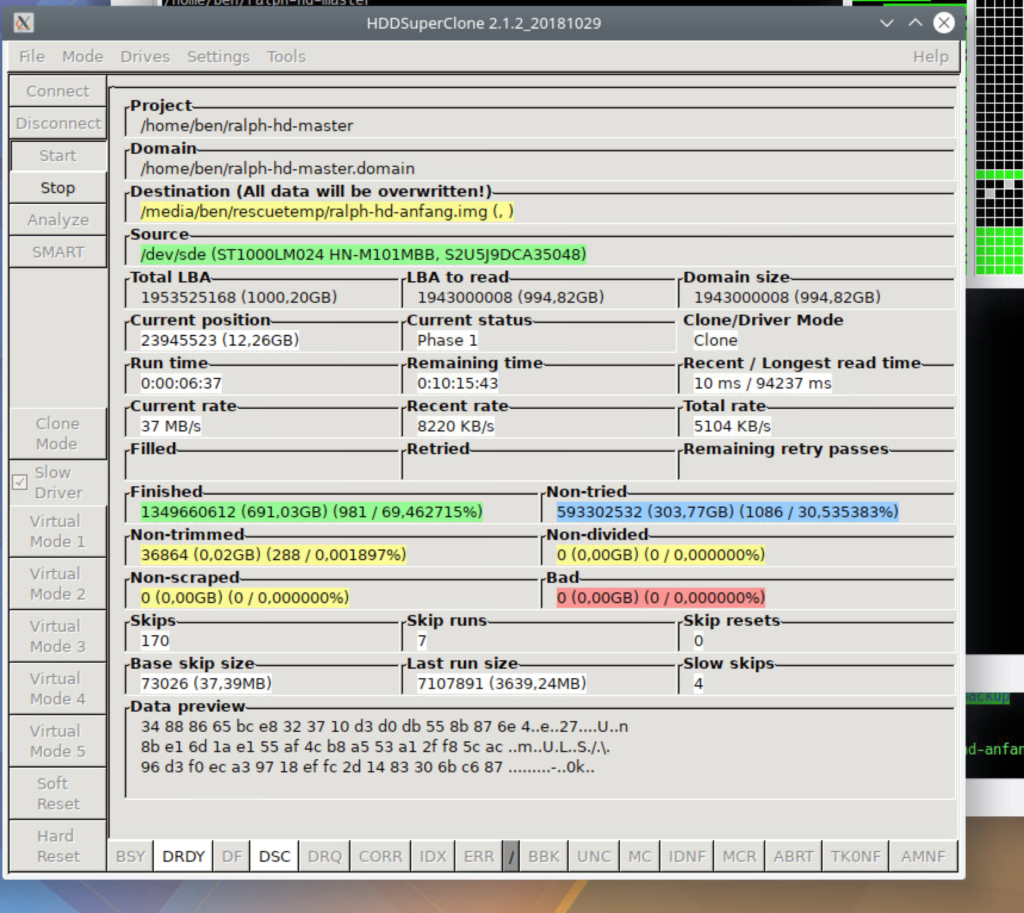
On a forum that is mostly used by data recovery specialists, I stumbled upon a post mentioning "HDDSuperClone" as an upgrade to "ddrescue" - complete with GUI and certain skip algorithms for HDDs with very slow or non-readable sectors. After downloading the proper .deb to my ubuntu box and reading the detailed manual, I started on my next imaging attempt. Normally, you would just launch "HDDSuperClone" with default options. It will read a HD from the first to last sector, while skipping unreadable or very slow sectors with a specialized skip-algorithm. This algorithm learns about the drive's reading issues, resulting in a swift first attempt at recovering as much data as possible in a reasonable amount of time in a „Phase 1“. After that, phases 2 - 4 will try to read even more data which was ininitially skipped by the read algorithm in phase 1, ending in a phase that will not skip anything - no matter how slow the reading speed ist. All of this can be configured in the GUI of "HDDSuperClone" to meet the needs of your broken drive. Having experienced the success of my little project on trying to recover a partial image of the broken HD from my friend (using "HDDSuperClone" and "R-Studio") - which resulted in a file table and some files - I thought of making a blog post about this nice tool. "HDDSuperClone" comes in a free version that already has much to offer. A paid PRO Version is available, either as a 30 days or lifetime edition (for the current major release). Being the optimistic person I am, I reached out to the developer, asking for a review licence to test some pro features like direct-AHCI and a virtual disk mode (more on that later) and other nice things. Within a day, I got a first positive response and continued with the provided test license. The programmer kindly offered advice and help with the review project this had turned into, and we both agreed on emphasizing that my DIY opening of the drive certainly didn't help on the drive's life expectancy, and that better results may have been possible with an unopened drive. I also had to do different approaches due to the drive locking up (more on that later).
Testing PRO
Using the direct AHCI mode now, which can send hard and soft resets to the drive when encountering lockups, I had a somewhat higher success rate on reading good data. Sometimes the drive would still lock up, which was why I put an app switchable smart power outlet and an external power supply on the drive, which allowed me to quickly power cycle it to continue reading it without manual intervention. The PRO Version can make use of an USB relay to automate the process of power cycling an unresponsive drive.
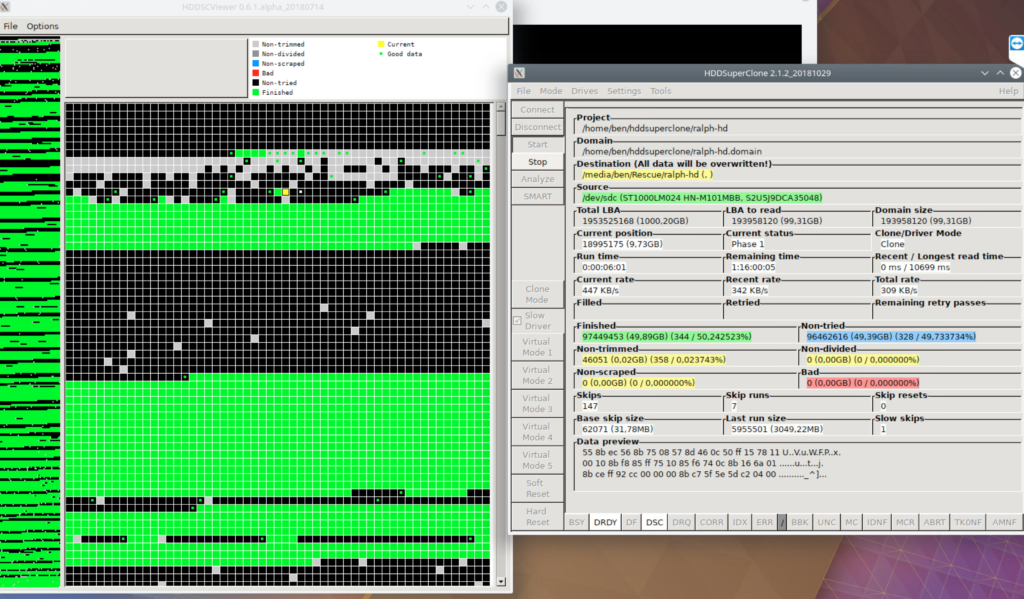
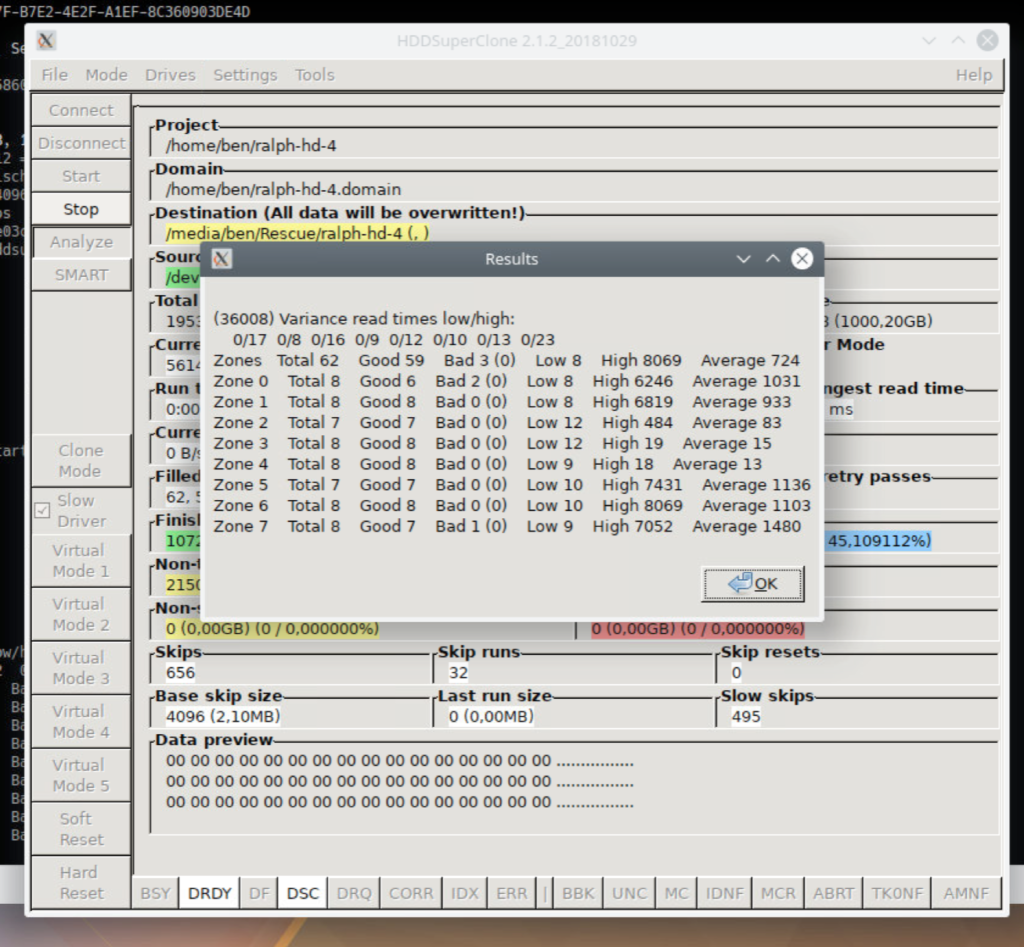
After various attempts and a few days of playing around with settings due to the drive locking up again and again, I ended up with an image containing about 72 % of the drive's data, including a lot of empty space that was never used for anything. The drive was 1 TB and partitioned with about 2x 500 GB and a recovery drive. Since the programmer provides a tool called "HDDSCViewer", you can graphically show the drive's read status based upon the project data of "HDDSuperClone". The technical data of the broken 2.5“ drive showed that it has 4 heads. Since some data from the drive came with a reading speed of about 70 - 80 mb/sec, some with 400 - 500 kb/sec, and some sectors were unreadable, I concluded that 1 head was dead, 1 head was weak and 2 heads were probably still fine, resulting in nearly 3/4 of readable sectors. A weak head can be compared to a far-sighted person using broken glasses (or no glasses) to read a book - it's still possible, but will take more time. I also concluded that a professional data recovery studio could probably replace the heads and get more data off it. I extracted everything possible from the cloned image with "R-Studio" and sent the data to my friend, who appreciated the amount that was extractable. I recommended considering a professional approach for the rest.
One very interesting feature of "HDDSuperClone PRO" is the „Virtual Disk Drive“. You can use a third party recovery tool (e.g. "R-Studio") to access the damaged drive through "HDDSuperClone". Virtual Disk Drive has one mode in which you can mark the needed sectors of a HDD while it is being read by a third party tool (this will get "0" on this virtual mark-log read-attempt). The resulting mark-log can be used to only read those sectors specifically. You can find a better explanation in the manual. Unfortunately, the drive I had was not a good option to test this on, as the file table was not completely readable - at least not in a way that would easily work in this case.
Conclusion
So how does "HDDSuperClone" compare to "ddrescue"? Well, first of all, I am a big fan of having a GUI - especially if a tool is more complex. While I most definitely like to use the console, I prefer more visibility when there are a lot of settings to tweak. While there are options to use "ddrescue" with a GUI ("ddrescue-gui"), I prefer "HDDSuperClone", since it's not relying on third party integration.
What I also liked was having a good default set of settings available. Depending on the drive you have, you could just do a 1-click image of a drive via "HDDSuperClone" - especially when also getting a USB relay for automatic power cycling in case of lockups - and you would get the most possible amount of data on an image on your computer.
While I would definitely spend money on a professional recovery service if the data is worth it (I do a lot of backups, so risks are slim 😉 ), I think that "HDDSuperClone" is a nice upgrade to "ddrescue". It is certainly worth spending money on the PRO version if you sometimes stumble upon broken drives that are not worth the few hundred euros/dollars that a professional service will (rightfully) ask for. I would also recommend "R-Studio" (for Windows, Linux or Mac) to scan and extract Data from the image created by "HDDSuperClone" or "ddrescue". "R-Studio" can also image drives and create areas (not) to read, though that didn't help in this case.